文本介绍怎样在 Windows 和 Linux 下搭建 ZooKeeper 单机环境。
Windows
下载安装包
访问 https://zookeeper.apache.org/releases.html 地址进入下载页面:
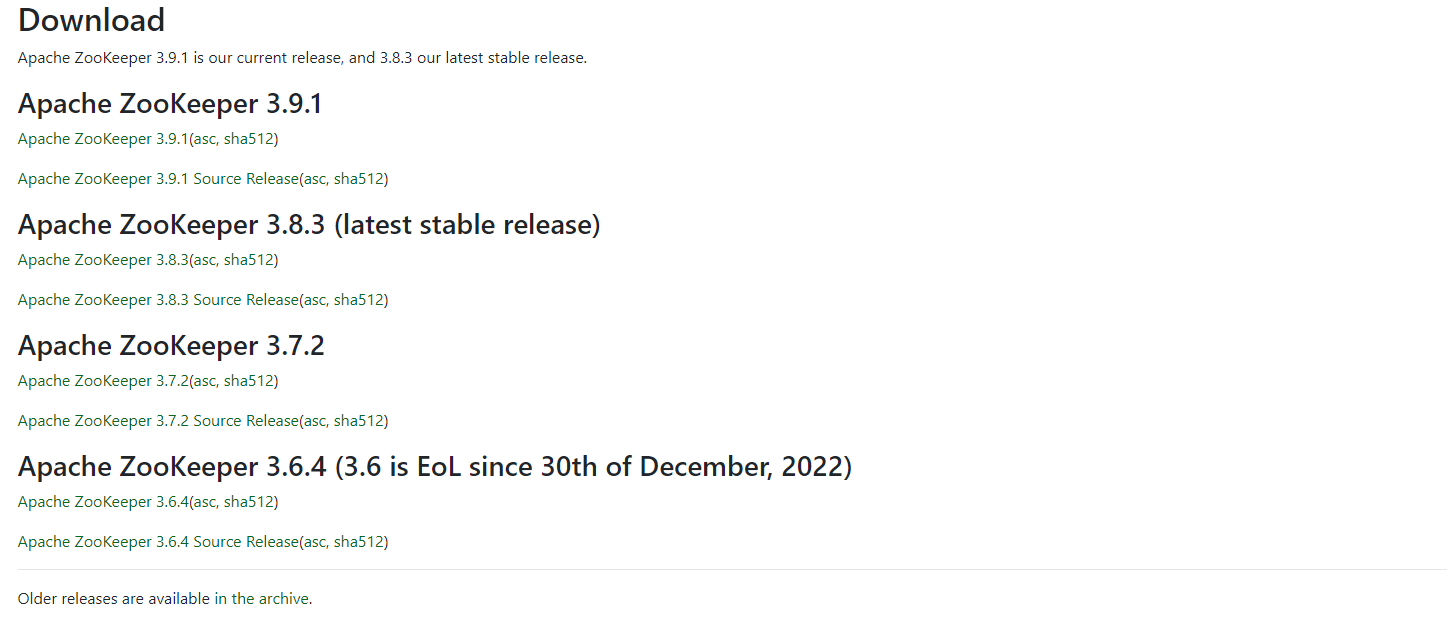
根据自己的需要选择版本下载,笔者下载最新版本 Apache ZooKeeper 3.9.1。
ZooKeeper 广告位
解压安装包
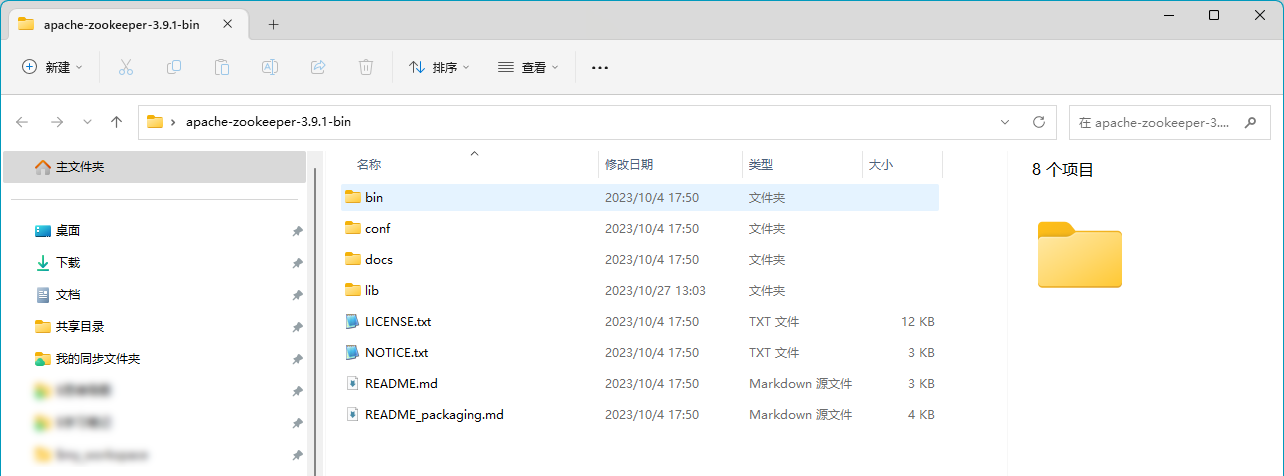
解压上面下载的安装包到指定位置(根据读者自己的喜好选择,如 D 盘等),如下图:
创建配置
进入到 Zookeeper 的 conf 目录,复制 zoo_sample.cfg 示例配置文件,重命名为 zoo.cfg,然后做如下配置:
(1)创建数据目录,用来存放 ZooKeeper 的数据的目录。笔者数据目录为 C:\Users\Administrator\Desktop\apache-zookeeper-3.9.1-bin\data
(2)修改 zoo.cfg 配置文件,配置 Zookeeper 的数据存放目录,如下:
# The number of milliseconds of each tick
tickTime=2000
# The number of ticks that the initial
# synchronization phase can take
initLimit=10
# The number of ticks that can pass between
# sending a request and getting an acknowledgement
syncLimit=5
# the directory where the snapshot is stored.
# do not use /tmp for storage, /tmp here is just
# example sakes.
# 这里是重点,配置 ZooKeeper 的数据目录
dataDir=C:\Users\Administrator\Desktop\apache-zookeeper-3.9.1-bin\data
# the port at which the clients will connect
clientPort=2181
# the maximum number of client connections.
# increase this if you need to handle more clients
#maxClientCnxns=60
#
# Be sure to read the maintenance section of the
# administrator guide before turning on autopurge.
#
# https://zookeeper.apache.org/doc/current/zookeeperAdmin.html#sc_maintenance
#
# The number of snapshots to retain in dataDir
#autopurge.snapRetainCount=3
# Purge task interval in hours
# Set to "0" to disable auto purge feature
#autopurge.purgeInterval=1

## Metrics Providers
#
# https://prometheus.io Metrics Exporter
#metricsProvider.className=org.apache.zookeeper.metrics.prometheus.PrometheusMetricsProvider
#metricsProvider.httpHost=0.0.0.0
#metricsProvider.httpPort=7000
#metricsProvider.exportJvmInfo=true
运行 ZooKeeper
进入 Zookeeper 的 bin 目录,运行 zkServer.cmd 脚本,如下图:
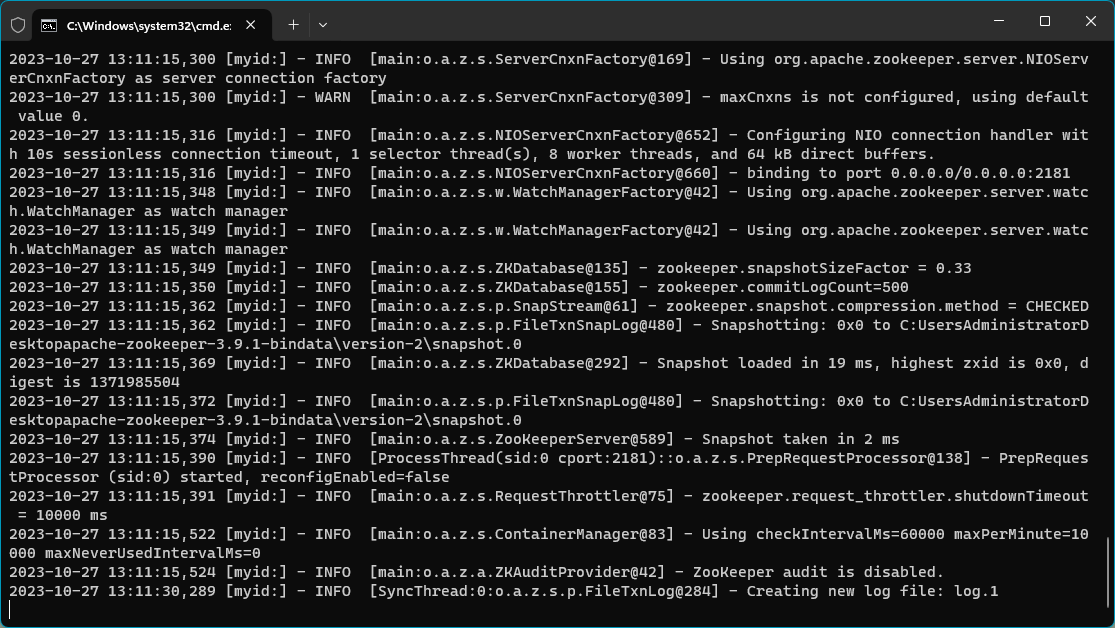
此时,ZooKeeper 启动成功了,看输出 “binding to port 0.0.0.0/0.0.0.0:2181” 可知,运行在 2181 端口。
验证 Zookeeper
同样,进入 Zookeeper 的 bin 目录,运行 zkCli.cmd 脚本,然后执行 “ls /” 命令。如下图:
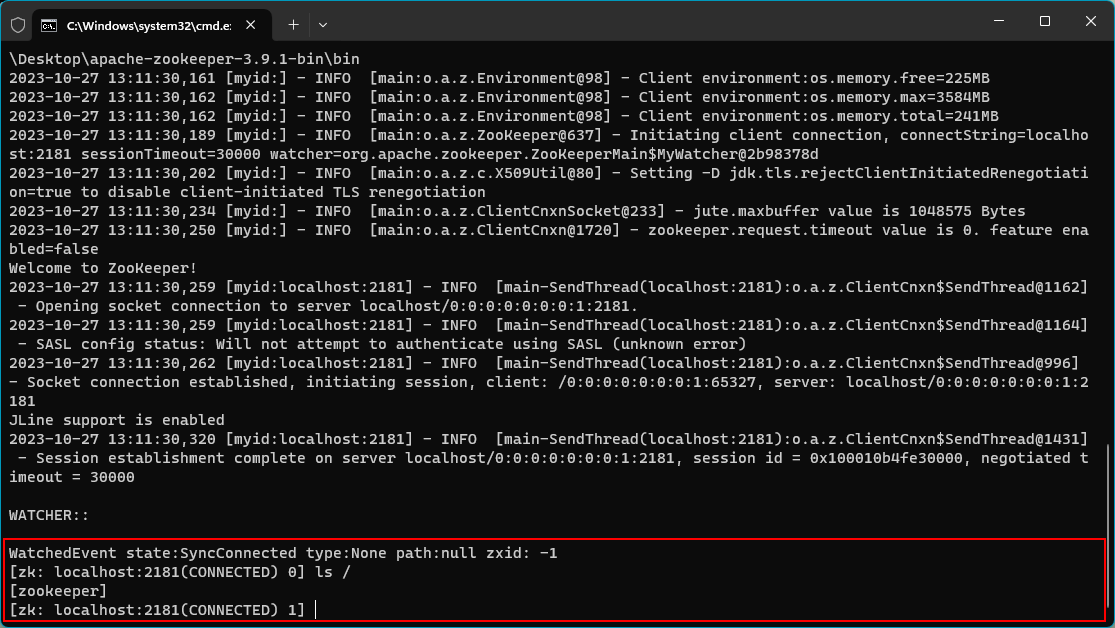
注意:ls / 命令用来查看 / 路径下面的节点,/ 路径下面只有一个 zookeeper 节点。
ZooKeeper 广告位
Linux
注意:以 Ubuntu 21.10 x64 系统为例。
下载安装包
使用 wget 下载安装包,下载地址 https://dlcdn.apache.org/zookeeper/zookeeper-3.9.1/apache-zookeeper-3.9.1-bin.tar.gz,如下:
hxstrive@localhost:~$ wget https://dlcdn.apache.org/zookeeper/zookeeper-3.9.1/apache-zookeeper-3.9.1-bin.tar.gz
--2023-10-27 13:19:47--  https://dlcdn.apache.org/zookeeper/zookeeper-3.9.1/apache-zookeeper-3.9.1-bin.tar.gz
Resolving dlcdn.apache.org (dlcdn.apache.org)... 151.101.2.132, 2a04:4e42::644
Connecting to dlcdn.apache.org (dlcdn.apache.org)|151.101.2.132|:443... connected.
HTTP request sent, awaiting response... 200 OK
Length: 20323219 (19M) [application/x-gzip]
Saving to: ‘apache-zookeeper-3.9.1-bin.tar.gz’

apache-zookeeper-3.9.1-bin.ta   2%[>                                                 ] 432.00K  14.2KB/s    eta 2h 20m ^C
...
解压安装包
使用 tar -xvzf 命令解压安装包,如下:
hxstrive@localhost:~$ tar -xvzf apache-zookeeper-3.9.1-bin.tar.gz
apache-zookeeper-3.9.1-bin/docs/
apache-zookeeper-3.9.1-bin/docs/images/
apache-zookeeper-3.9.1-bin/docs/skin/
apache-zookeeper-3.9.1-bin/docs/images/2pc.jpg
apache-zookeeper-3.9.1-bin/docs/images/bk-overview.jpg
...

hxstrive@localhost:~$ cd apache-zookeeper-3.9.1-bin/
hxstrive@localhost:~/apache-zookeeper-3.9.1-bin$ ll
total 48
drwxrwxr-x  6 hxstrive hxstrive  4096 10月 27 13:25 ./
drwxr-x--- 26 hxstrive hxstrive  4096 10月 27 13:25 ../
drwxr-xr-x  2 hxstrive hxstrive  4096 10月  4 17:50 bin/
drwxr-xr-x  2 hxstrive hxstrive  4096 10月  4 17:50 conf/
drwxr-xr-x  5 hxstrive hxstrive  4096 10月  4 17:50 docs/
drwxrwxr-x  2 hxstrive hxstrive  4096 10月 27 13:25 lib/
-rw-r--r--  1 hxstrive hxstrive 11358 10月  4 17:50 LICENSE.txt
-rw-r--r--  1 hxstrive hxstrive  2084 10月  4 17:50 NOTICE.txt
-rw-r--r--  1 hxstrive hxstrive  2335 10月  4 17:50 README.md
-rw-r--r--  1 hxstrive hxstrive  3570 10月  4 17:50 README_packaging.md
创建配置
进入到 Zookeeper 的 conf 目录,复制 zoo_sample.cfg 示例配置文件,重命名为 zoo.cfg,然后做如下配置:
(1)创建数据目录,用来存放 ZooKeeper 的数据的目录。如下:
hxstrive@localhost:~/apache-zookeeper-3.9.1-bin$ mkdir data
hxstrive@localhost:~/apache-zookeeper-3.9.1-bin$ cd data
hxstrive@localhost:~/apache-zookeeper-3.9.1-bin/data$ pwd
/home/hxstrive/apache-zookeeper-3.9.1-bin/data
(2)修改 zoo.cfg 配置文件,配置 Zookeeper 的数据存放目录,如下:
hxstrive@localhost:~/apache-zookeeper-3.9.1-bin/conf$ cp zoo_sample.cfg zoo.cfg
hxstrive@localhost:~/apache-zookeeper-3.9.1-bin/conf$ vim zoo.cfg
zoom.cfg 内容如下:
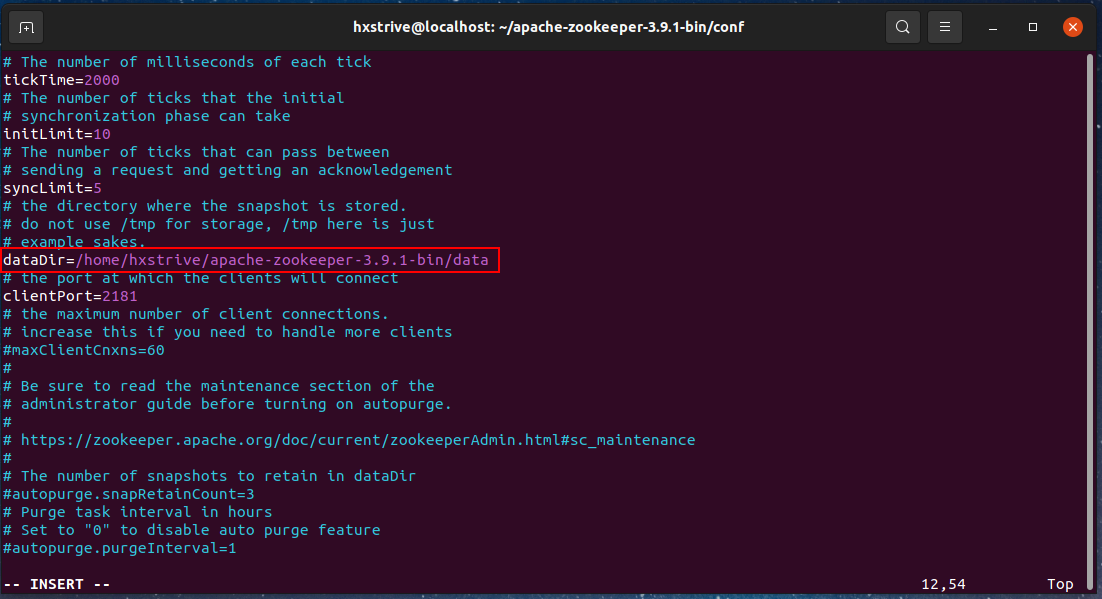
修改后使用 :wq 保存内容。
运行 ZooKeeper
进入 Zookeeper 的 bin 目录,运行 zkServer.sh 脚本,如下:
# 启动 ZooKeeper
hxstrive@localhost:~/apache-zookeeper-3.9.1-bin/bin$ ./zkServer.sh start
/usr/bin/java
ZooKeeper JMX enabled by default
Using config: /home/hxstrive/apache-zookeeper-3.9.1-bin/bin/../conf/zoo.cfg
Starting zookeeper ... STARTED  -- 启动成功

# 查看 ZooKeeper 的状态
hxstrive@localhost:~/apache-zookeeper-3.9.1-bin/bin$ ./zkServer.sh status
/usr/bin/java
ZooKeeper JMX enabled by default
Using config: /home/hxstrive/apache-zookeeper-3.9.1-bin/bin/../conf/zoo.cfg
Client port found: 2181. Client address: localhost. Client SSL: false.
Mode: standalone -- 单机模式
验证 Zookeeper
同样,进入 Zookeeper 的 bin 目录,运行 zkCli.sh 脚本,然后执行 “ls /” 命令。如下:
hxstrive@localhost:~/apache-zookeeper-3.9.1-bin/bin$ ./zkCli.sh
/usr/bin/java
Connecting to localhost:2181
...
WATCHER::
WatchedEvent state:SyncConnected type:None path:null zxid: -1
[zk: localhost:2181(CONNECTED) 0] ls /
[zookeeper]
[zk: localhost:2181(CONNECTED) 1]
注意:ls / 命令用来查看 / 路径下面的节点,/ 路径下面只有一个 zookeeper 节点。


