本章节将介绍我们自定义 @Conditional 注解的条件。
在 @Conditional 注解的源码中,value 属性接收一个类型为 Condition 的 Class 数组。源码如下:
@Target({ElementType.TYPE, ElementType.METHOD})
@Retention(RetentionPolicy.RUNTIME)
@Documented
public @interface Conditional {
/**
 * All {@link Condition} classes that must {@linkplain Condition#matches match}
 * in order for the component to be registered.
 */
Class<? extends Condition>[] value();
}
Condition 接口定义了 @Conditional 注解的条件,你可以为 @Conditional 注解指定一个或多个条件,只有当匹配了所有指定的条件才能成功注册组件。
Condition 将在即将注册 Bean 定义之前进行检查,并且可以根据它的 matches() 方法返回值动态决定是否注册组件(true-允许注册;false-不允许注册)。
注意:Condition 必须遵循与 BeanFactoryPostProcessor 相同的限制,并注意永远不要与 bean 实例交互。对于与 @Configuration bean 交互的条件的更细粒度控制,请考虑实现 ConfigurationCondition 接口。
Condition 接口源码如下:
@FunctionalInterface
public interface Condition {
    /**
     * Determine if the condition matches.
     * @param context the condition context
     * @param metadata the metadata of the {@link org.springframework.core.type.AnnotationMetadata class}
     * or {@link org.springframework.core.type.MethodMetadata method} being checked
     * @return {@code true} if the condition matches and the component can be registered,
     * or {@code false} to veto the annotated component's registration
     */
    boolean matches(ConditionContext context, AnnotatedTypeMetadata metadata);
}
该接口仅仅定义了一个 matches() 方法,该方法用来确定条件是否匹配(匹配返回true,否则返回false)。
springboot广告位
示例
我们通过一个示例来演示自己实现 Condition 接口,然后配合 @Conditional 注解一起使用。然后在 @Configuration 配置上动态决定是否将该配置下面的 bean 注册到 Spring 容器中。详细代码如下:
(1)实现 Condition 接口,自定义条件 MyCondition。代码如下:
public class MyCondition implements Condition {
    @Override
    public boolean matches(ConditionContext context, AnnotatedTypeMetadata metadata) {
        // 这里什么业务逻辑也没有,直接返回结果,仅仅为了方便测试
        return true;
    }
}
(2)编写两个自己的服务,代码如下:
a、Service1.java
public class Service1 {
    public String show() {
        return Service1.class.getName();
    }
}
b、Service2.java
public class Service2 {
    public String show() {
        return Service2.class.getName();
    }
}
(3)创建一个 @Configuration 配置类,代码如下:
@Configuration
@Conditional(MyCondition.class)
public class MyConfig {

    @Bean
    public Service1 service1() {
        return new Service1();
    }

    @Bean
    public Service2 service2() {
        return new Service2();
    }
}
上面配置类将根据 @Conditional(MyCondition.class) 注解中指定的 MyCondition 类的 matches() 方法返回结果动态决定是否将 Service1 和 Service2 实例化且注册到 Spring 容器中。
(4)客户端。用来验证我们是否真的根据 MyCondition 动态将 Service1 和 Service2 实例注册到 Spring 容器中。代码如下:
import com.huangx.springboot.autoconfig.service.Service1;
import com.huangx.springboot.autoconfig.service.Service2;
import org.springframework.beans.factory.annotation.Autowired;
import org.springframework.boot.SpringApplication;
import org.springframework.boot.autoconfigure.SpringBootApplication;
import org.springframework.context.ApplicationContext;
import org.springframework.web.bind.annotation.GetMapping;
import org.springframework.web.bind.annotation.RestController;

@RestController
@SpringBootApplication
public class SpringbootAutoconfigDemo1Application {

    @Autowired
    private ApplicationContext context;

    public static void main(String[] args) {
        SpringApplication.run(SpringbootAutoconfigDemo1Application.class, args);
    }

    @GetMapping("/")
    public String index() {
        Service1 service1 = null;
        try {
            service1 = context.getBean(Service1.class);
        } catch (Exception e) {
            System.err.println(e.getMessage());
        }

        Service2 service2 = null;
        try {
            service2 = context.getBean(Service2.class);
        } catch (Exception e) {
            System.err.println(e.getMessage());
        }

        return "successful<br/>" +
                "service1=" + service1 + "</br>" +
                "service2=" + service2;
    }


}
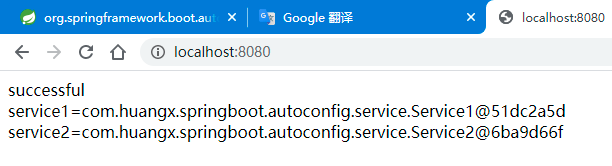
如果 MyCondition.matches() 方法返回 true,你访问 http://localhost:8080 结果如下图:
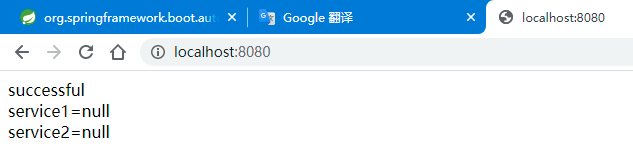
如果 MyCondition.matches() 方法返回 false,你访问 http://localhost:8080 结果如下图:
上面仅仅演示了最最简单的用法,你还可以根据 Java 中的属性值、JDK版本、操作系统类型等等不同的条件,动态选择配置和初始化。

 川公网安备51010802032098