以下是使用 Docker 安装 GitLab 的步骤:
安装 Docker
如果还未安装 Docker,你需要先安装 Docker。具体安装方法可以参考 Docker 官方文档,根据你的操作系统进行安装。
🌈💥点击查看“Linux 下安装 Docker”或者“Windows 下安装 Docker”💥💥
拉取 gitlab 镜像
使用以下 Docker 命令来拉取 GitLab 官方镜像:
root@g450:~# docker pull gitlab/gitlab-ce
Using default tag: latest
latest: Pulling from gitlab/gitlab-ce
857cc8cb19c0: Pull complete
28812802a434: Pull complete
54e2e989e54c: Pull complete
abb7892b26dc: Pull complete
e9d667f5a8c1: Pull complete
a8891519352d: Pull complete
8b624a00a604: Pull complete
0cf3370d74b6: Pull complete
3253094bd895: Pull complete
Digest: sha256:6f2ab9c42cef6b8058ef45042ce33a4505a0a9ac1a8d9ed85016ceca743dd01d
Status: Downloaded newer image for gitlab/gitlab-ce:latest
docker.io/gitlab/gitlab-ce:latest

root@g450:~# docker images | grep gitlab
gitlab/gitlab-ce                latest    b3c3467dc55c   10 days ago    3.03GB
⚠️注意:由于 gitlab 安装包有点大,请耐心等待……🍵🍵🍵
运行容器
使用 docker run 命令去启 GitLab 容器:
docker run --detach \
  --hostname hxstrive.com \
  --publish 443:443 --publish 3000:80 --publish 2222:22 \
  --name gitlab \
  --restart always \
  --volume /var/gitlab/config:/etc/gitlab \
  --volume /var/gitlab/logs:/var/log/gitlab \
  --volume /var/gitlab/data:/var/opt/gitlab \
  gitlab/gitlab-ce
参数说明:
--detach:在后台运行容器。
--hostname:设置 GitLab 容器的主机名。
--publish:将容器的端口映射到主机的端口。这里映射了 443(HTTPS)、3000(HTTP)和 2222(SSH)端口。
--name:为容器指定一个名称。
--volume:将容器内的特定目录映射到主机的目录,以保存配置、日志和数据。
--restart always:确保容器在主机启动时自动启动。
执行完上面命令后需要等待一段时间,让 GitLab 容器完成初始化。当然,你也可以使用 docker logs 命令查看容器启动的日志。
docker
访问 Gitlab
可以通过浏览器访问宿主机和端口(例如 http://宿主机IP:3000)来访问 GitLab 界面,如下图:
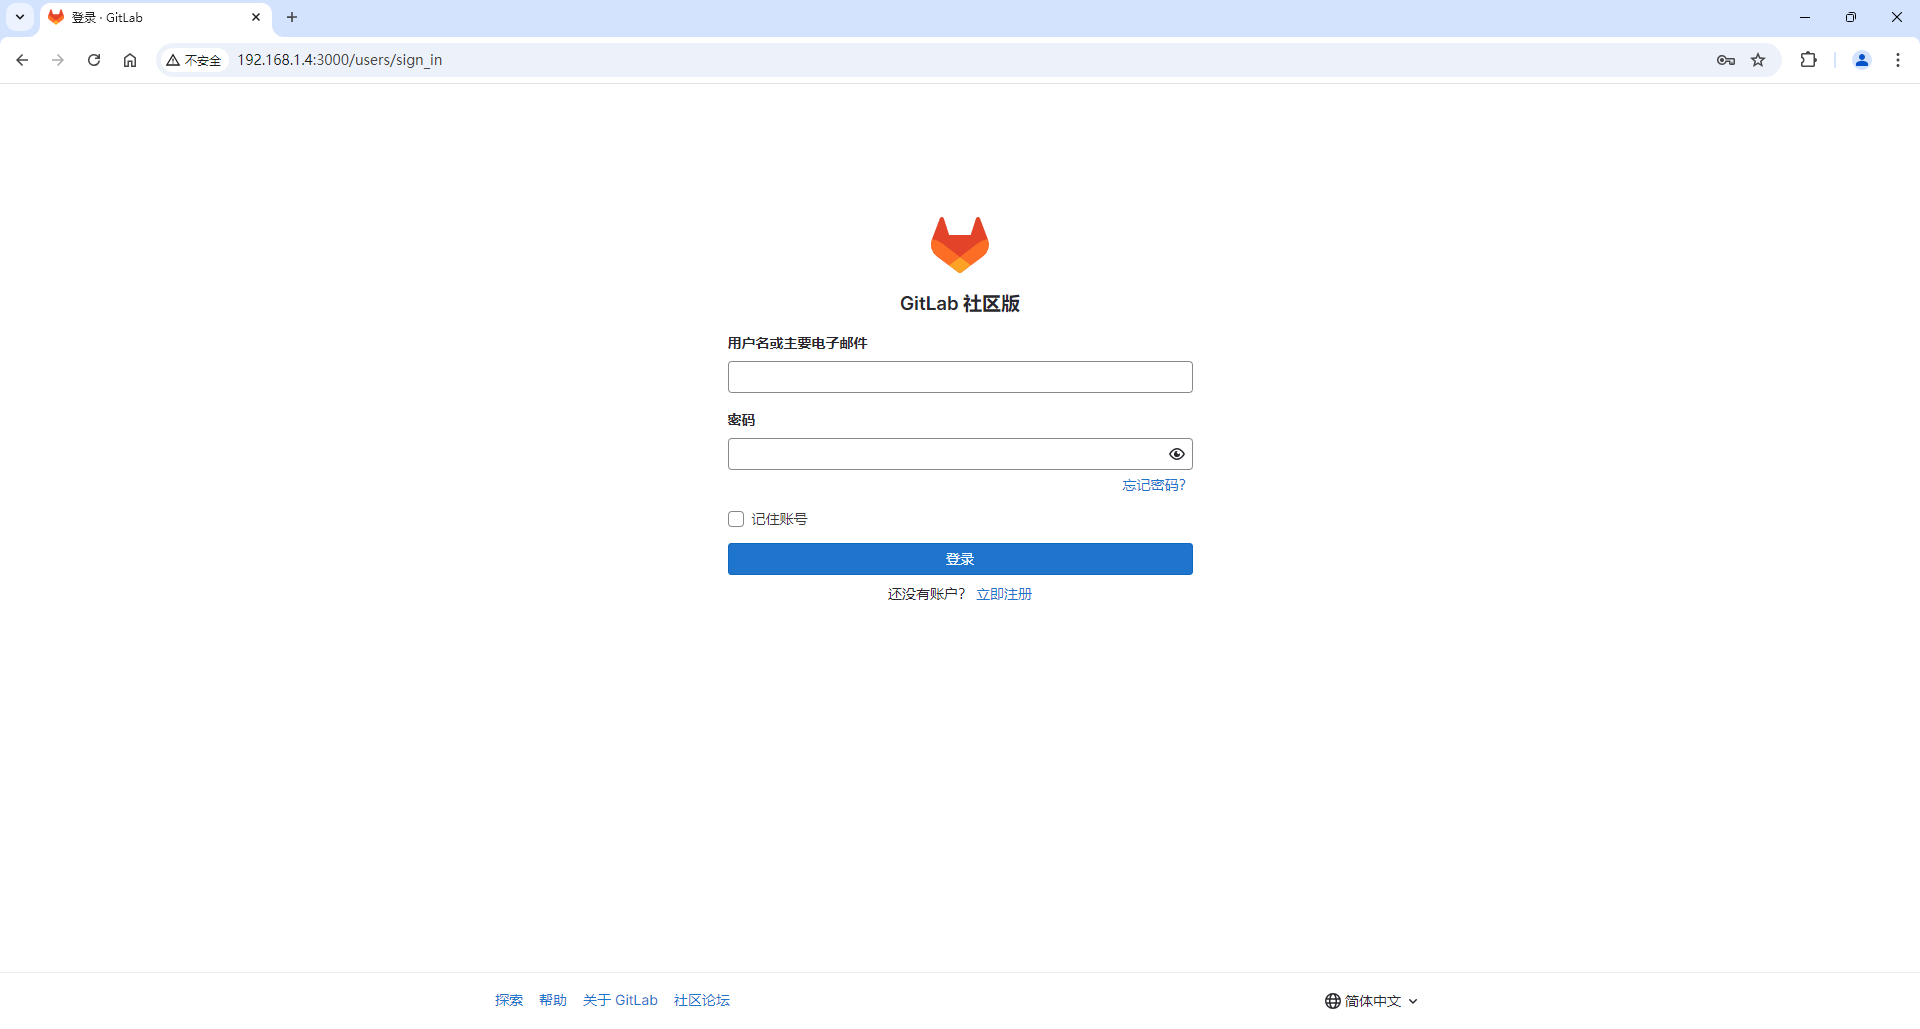
首次访问时,需要设置初始管理员(root)密码等操作。可以在 /var/gitlab/config/initial_root_password 文件中获取初始化密码。
root@g450:/var/gitlab/config# ll
total 208
-rw------- 1 root root 156388  8月 31 08:04 gitlab.rb
-rw------- 1 root root  19057  8月 31 08:05 gitlab-secrets.json
-rw------- 1 root root    749  8月 31 08:05 initial_root_password
-rw------- 1 root root    513  8月 31 08:04 ssh_host_ecdsa_key
-rw-r--r-- 1 root root    179  8月 31 08:04 ssh_host_ecdsa_key.pub
-rw------- 1 root root    411  8月 31 08:04 ssh_host_ed25519_key
-rw-r--r-- 1 root root     99  8月 31 08:04 ssh_host_ed25519_key.pub
-rw------- 1 root root   2602  8月 31 08:04 ssh_host_rsa_key
-rw-r--r-- 1 root root    571  8月 31 08:04 ssh_host_rsa_key.pub
drwxr-xr-x 2 root root   4096  8月 31 08:05 trusted-certs/

root@g450:/var/gitlab/config# cat initial_root_password
# WARNING: This value is valid only in the following conditions
#          1. If provided manually (either via `GITLAB_ROOT_PASSWORD` environment variable or via `gitlab_rails['initial_root_password']` setting in `gitlab.rb`, it was provided before database was seeded for the first time (usually, the first reconfigure run).
#          2. Password hasn't been changed manually, either via UI or via command line.
#
#          If the password shown here doesn't work, you must reset the admin password following https://docs.gitlab.com/ee/security/reset_user_password.html#reset-your-root-password.

👉Password: ClIRRnhZo4rfPfR5qDmPPoWcGYcsvxUw0GQj+NfdNic=

# NOTE: This file will be automatically deleted in the first reconfigure run after 24 hours.
💥注意,/var/gitlab/config 目录是我们运行容器时映射到宿主机的目录,上面的“ClIRRnhZo4rfPfR5qDmPPoWcGYcsvxUw0GQj+NfdNic=”就是超级管理员 root 的初始化密码。
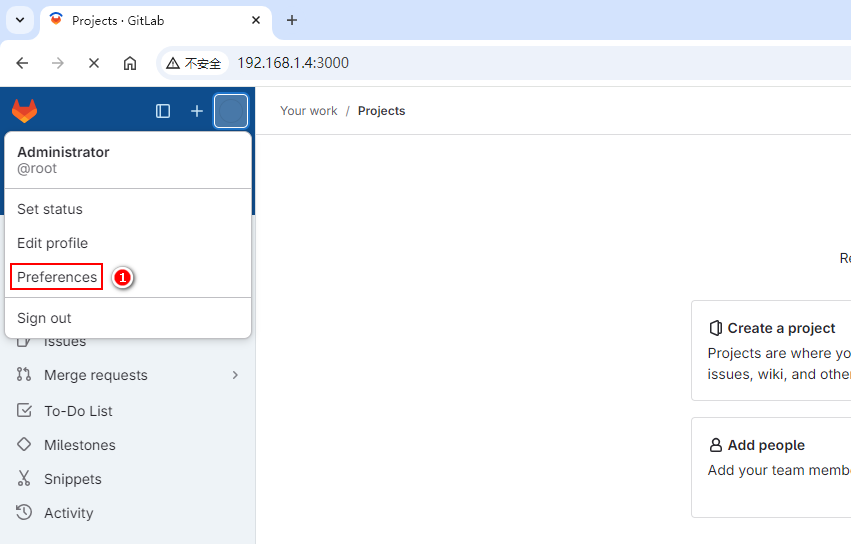
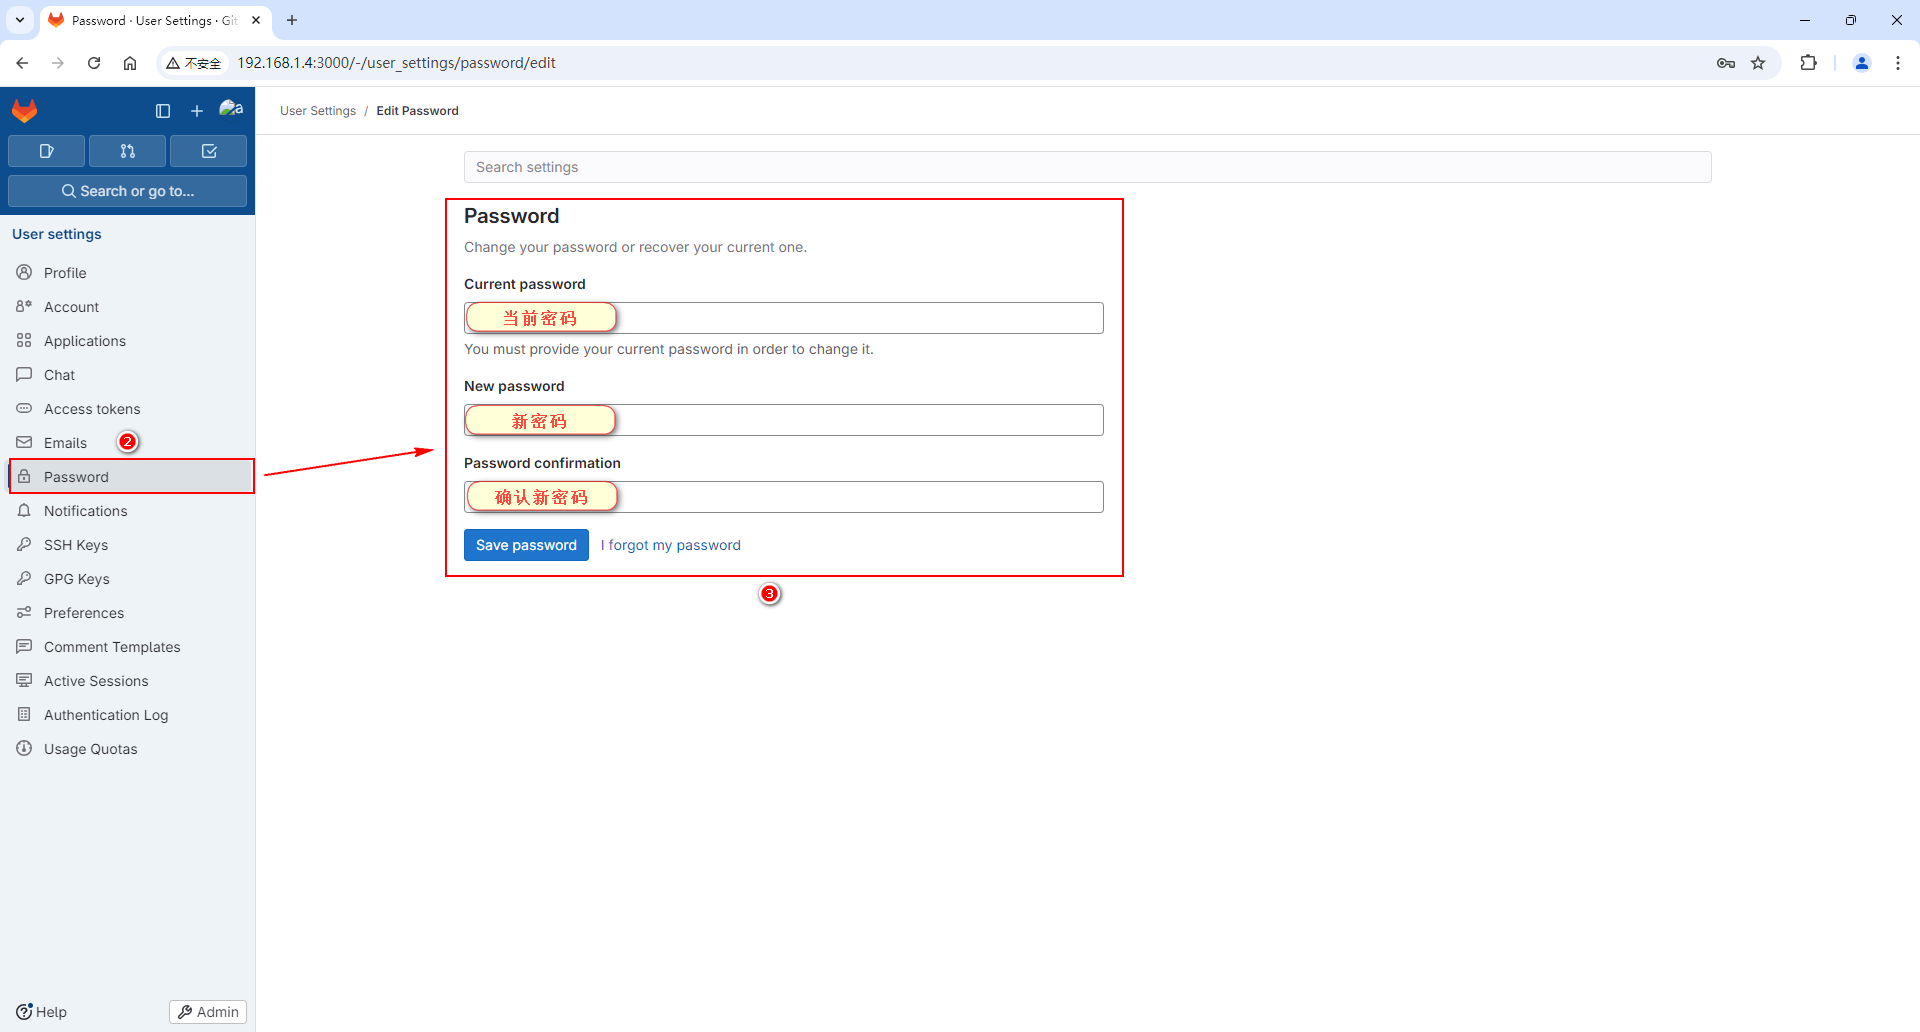
当你使用 root / ClIRRnhZo4rfPfR5qDmPPoWcGYcsvxUw0GQj+NfdNic= 登录到 gitlab 后,先去修改密码,如下图:
到这里,gitlab 安装成功了……👍👍👍👍
沉浸于现实的忙碌之中,没有时间和精力思念过去,成功也就不会太远了。——雷音


 川公网安备51010802032098